Sunday, February 19, 2012

Adventures in Nail Art


Recently while browsing through my favorite blog MollsSheWrote, I came across this Cheetah Print nail tutorial that she had posted a while back, and was instantly inspired to try out this new look since I had recently purchased by Milani Black Sketch Nail Art nail polish!

Anyway, I just wanted to share my results with you guys, and tell you how I did it.
(If you wish to see a video tutorial for Cheetah/Leopard Print nails, check out this link!)

Inspiration:

Products:
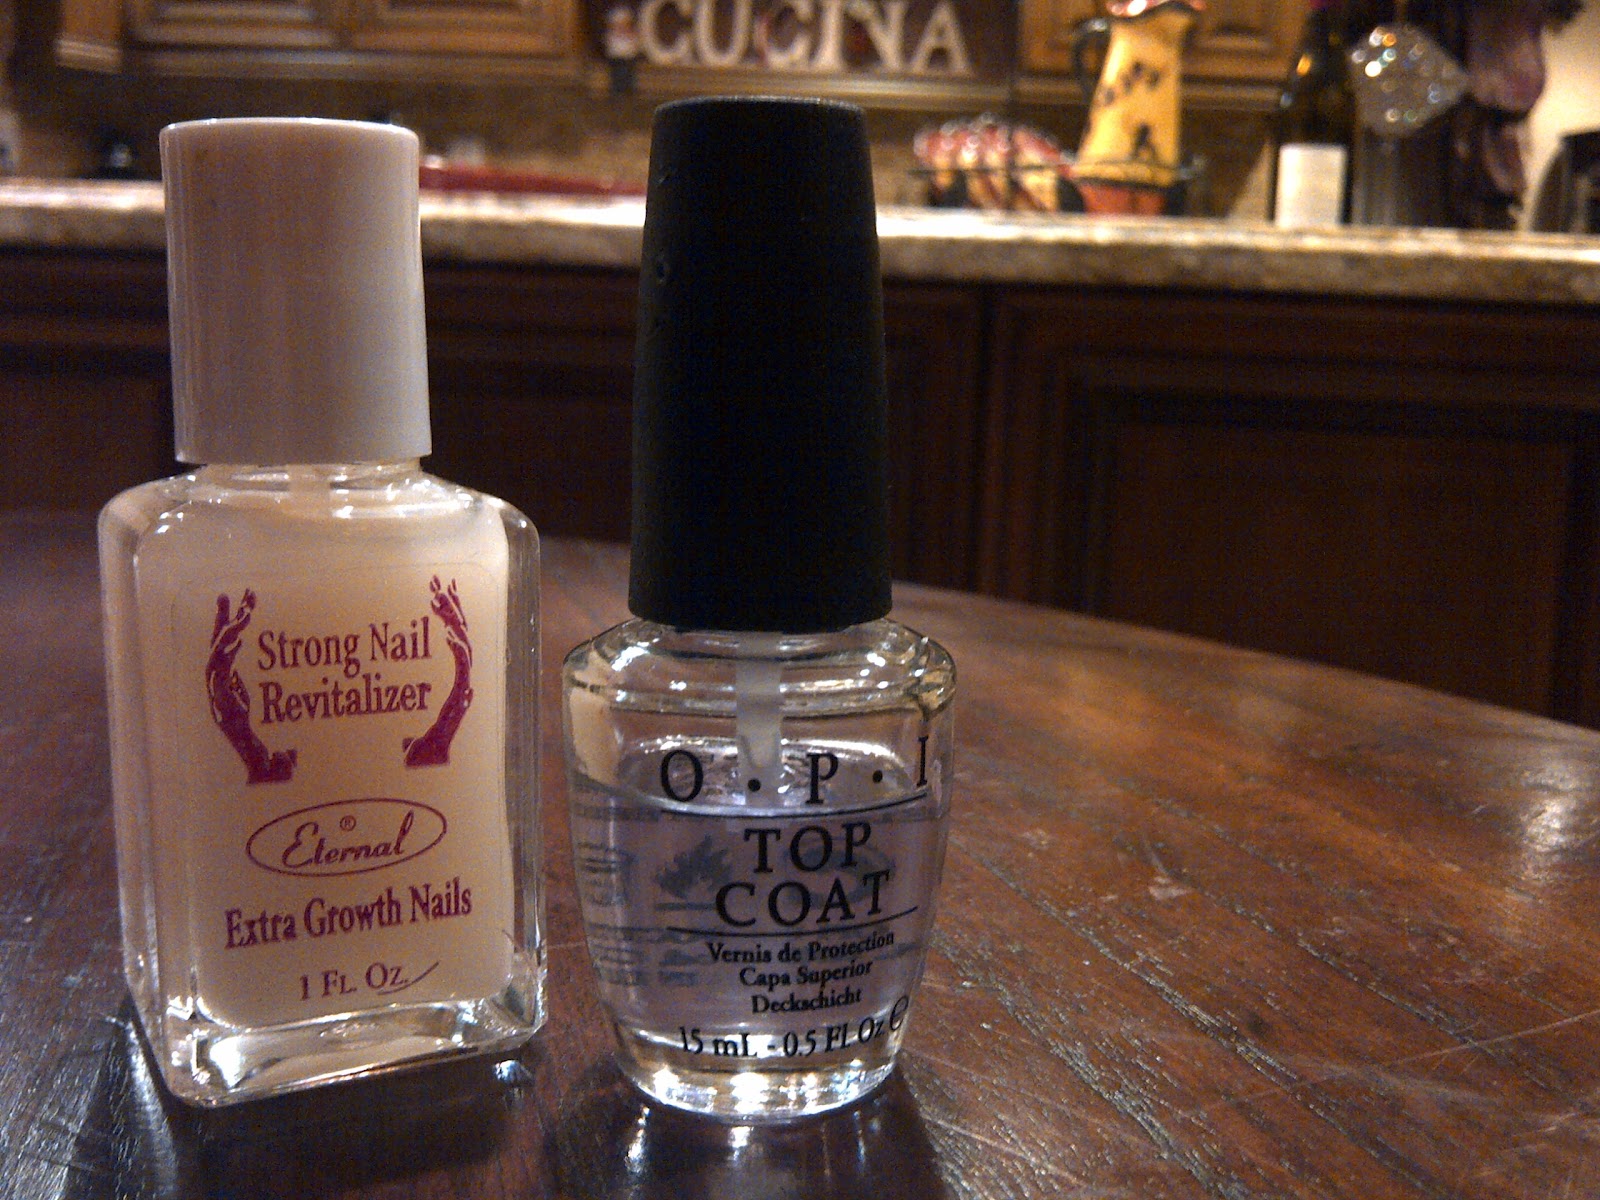
Eternal Strong Nail Revitalizer & OPI Top Coat

Essie French Affair, Katy Perry OPI The One That Got Away, Milani Nail Art in Black Sketch

How To:
  1. Gather your polishes! (Note: I used the Nail Revitalizer because I've noticed my nails have been a bit frail as of late, but you may use any basic Base Coat polish instead.)
  2. Apply the Base Coat and once dried, apply your base color - in this case French Affair by Essie.
  3. Once your base color has dried, take your second color (I recommend using a darker color polish for the spots) and apply different shaped splotches of paint onto the base color coat.
  4. After your spots have completely dried, take whichever polish you are using for your outline and paint small lines around the edges of your spots - make sure to leave small breaks in your lines in order to make your spots look leopard-like! You'll want to paint two to three outlines per spot.
  5. In order to add an even more leopard-esque effect, you may want to paint small dots or lines in either the spot color or outline color onto the base color coat surrounding the spots.
  6. Allow your outlines to dry completely in order to avoid running or smudging.
  7. Finally, apply your Top Coat, and voilĂ ! Your look is complete!
Finished Product:

Note: If you don't have a nail art nail polish, you can use a normal nail polish brush, you just have to be careful to be precise and use the edge of your brush to paint to outlines. Here's an example of a time when I tried this:


And there you are! Yet another easy-to-execute and ultra-chic manicure for you guys to enjoy! 

Sunday, February 12, 2012

Fancy Footwork

Missoni-inspired look for less!

Madden Girl pumps - $30 at Marshall's

Too chic for words! I couldn't resist them. Although mine are powder blue, cream, pale pink, pastel green, and plum, they also sold the pumps in maroon, plum, cream, and tan - as well as both patterns on  adorable flats as pictured above!

Tuesday, February 7, 2012

Adventures in Nail Art


This past weekend I watched the film Submarine with my boyfriend after having gone to dinner at the posh French restaurant, George's, to celebrate our four year anniversary. Armed with full tummies and extremely satisfied appetites, we finally got around to watching this film on my laptop (we are huge Alex Turner/Arctic Monkeys fans, and we simply couldn't wait to hear the beautiful soundtrack our baby had composed for the film). Anyway, although this seems like an off course story, you'll soon see its relevance  - I promise!

So we watched it and I was (and still am) immediately inspired by the beautiful and unique cinematography and characters themselves. I absolutely adored the pale colors sharply contrasted with vibrant reds and deep shades of navy and black. Because of this, I wanted to create Submarine-inspired nails! At first I attempted to do so by choosing the most Submarine-esque colors from my nail polish collection and marble it, but I ended up just getting a look at was vibrant, but in all the wrong ways. And although this was a bummer, the jumble of bright colors did set me on the track to De Stijl nails! :)

Inspiration:
Products:
(Rimmel London Top Coat/Base Coat Pro, OPI Top Coat, Essie Marshmallow, Milani Nail Art Black Sketch, OPI Lucerne-tainly Look Marvelous, OPI Katy Perry The One That Got Away, Milani Reddest Red. The blue and yellow polishes were part of a 4 piece nail polish set I bought once at Urban Outfitters and don't have names, sorry!)

How To:
  1. Apply base coat (I used the Rimmel London Base Coat); let dry.
  2. Paint nail with two coats of any white nail polish to use as a base (I used Marshmallow by Essie)
  3. Using your Nail Art nail polish (after the white base has dried), carefully paint the basic line patterns you would like to use on your nails - remember to keep it very clean and give yourself adequate space to apply blocks of color! Note: I used a white base because my yellow & blue paints were relatively thin and thus required a base in order to have a bolder hue, but it if you do not have this same issue with your colored polishes, the white base coat is not necessary.
  4.  Once you've plotted out your lines and they have dried (make sure they dry so you can avoid the black (or whichever color you are using for your lines) mixing with the colors in the blocks, choose your first color.
  5. As carefully as possible, choose a block to fill in with the color you have chosen. Make sure there isn't a build up or little bubble of paint on your brush before you start applying any colors - you don't want the glob to fall on your nail and ruin all your work! Note: You may want to apply this same color to a certain block on each nail at this time to streamline the painting process.
  6. Repeat step 6 with the rest of the colors you've chosen. Go over each color with a second coat of polish.
  7. Go over the black lines you initially framed your blocks with in order to make your nails look cleaner and more precise.
  8. Allow nails to completely dry before applying your top coat! You don't want the lines or colors to run/smudge after all that hard work (trust me, it happened to me, and the repairing process took way longer than it would have if I just would have been patient). 
  9. Once you've applied your top coat, allow your nails to dry once more. 
  10. Take a few Q-Tips and Nail Polish Remover. Pull as much of the cotton off the end of the Q-Tip as possible so you are left with a thin layer of cotton. rub this stray cotton in a clockwise motion around the stick of the Q-Tip so that it all adheres to the stick. 
  11. Pour some nail polish remover into the cap of the bottle and dip your Q-Tip into the cap. 
  12. Use this damp Q-Tip to clean the edges around your nails and finally get that fresh, clean manicured look! :)
As you can see, this is a very time-consuming manicure that requires tons of patience, but it is well-wroth it! Not only will you yourself not be able to stop staring at your fabulous nails once they are completed, but your friends will be swooning over them as well!

Finished Product:


Voila! 

I hope you've enjoyed this nail tutorial & I apologize for the somewhat low quality photography, haha. I used solely my MacBook Pro and handy Blackberry's cameras to make this magic, so the photography is understandably a bit fuzzy and all that. Anyway, hope you all go out there and try this super fun look that even Mondrian himself would be proud of, and you definitely don't have to be some skilled nail artist to create. :) 

Thanks for reading!

Tuesday, January 17, 2012

Electric FM

Where Do You Go To My Lovely? by Peter Sarstedt

One of my all-time favorite songs - if not my my all-time favorite. 

You talk like Marlene Dietrich
And you dance like Zizi Jeanmaire
Your clothes are all made by Balmain
And there's diamonds and pearls in your hair, yes there are

You live in a fancy apartment
Off the Boulevard Saint-Michel
Where you keep your Rolling Stones records
And a friend of Sacha Distel, yes you do

But where do you go to my lovely
When you're alone in your bed
Tell me the thoughts that surround you
I want to look inside your head, yes I do

I've seen all your qualifications
You got from the Sorbonne
And the painting you stole from Picasso
Your loveliness goes on and on, yes it does

When you go on your summer vacation
You go to Juan-les-Pins
With your carefully designed topless swimsuit
You get an even suntan on your back and on your legs

And when the snow falls you're found in Saint Moritz
With the others of the jet-set
And you sip your Napoleon brandy
But you never get your lips wet, no you don't

But where do you go to my lovely
When you're alone in your bed
Won't you tell me the thoughts that surround you
I want to look inside your head, yes I do

Your name, it is heard in high places
You know the Aga Khan
He sent you a racehorse for Christmas
And you keep it just for fun, for a laugh a-ha-ha-ha

They say that when you get married
It'll be to a millionaire
But they don't realize where you came from
And I wonder if they really care, or give a damn

Where do you go to my lovely
When you're alone in your bed
Tell me the thoughts that surround you
I want to look inside your head, yes I do

I remember the back streets of Naples
Two children begging in rags
Both touched with a burning ambition
To shake off their lowly-born tags, so they try

So look into my face Marie-Claire
And remember just who you are
Then go and forget me forever
But I know you still bear the scar, deep inside, yes you do

I know where you go to my lovely
When you're alone in your bed
I know the thoughts that surround you
'Cause I can look inside your head

Friday, January 13, 2012

Boss Bitches

There are two women in this world that I think of when I think of the word 'fierce'. And those ladies are:
Kate Moss
Lykke Li

Sunday, January 8, 2012

A Warm Welcome

Hello, everyone! I just wanted to post this little (slightly awkward) welcoming post to kick off this new blog I've started, which I plan to use as a creative outlet where I will blog about music, fashion, books, current events, and of all the things that my little heart desires! :)

I hope you enjoy sifting through my blog, and I hope that it in some way inspires you as well!
Related Posts Plugin for WordPress, Blogger...