Friday, March 16, 2012

What I Would Wear

If I Were Going to Ultra Music Festival
(and I didn't want to look really slutty)

  1. Shorts: If I were going to UMF, I would definitely play around with high-waisted denim shorts. Personally, I think it would be a fun opportunity to DIY (take old jeans and cut them into shorts - dye them, stud them, etc.). It might also be a fun chance to go dig through thrift store racks to find great statement shorts (or tops or other elements of your Ultra weekend attire), or simply find some fun, interesting patterned shorts at the mall.
  2. Crop Tops & Tank Tops: For Ultra, my top of choice would be a crop corset/bustier. I simply love these! They add a flirty, fun appeal to any outfit, and certainly work well for any outdoor music festival in sunny Miami, FL. If you want to go for the signature "sexy" look at Ultra, this will add that, but with a whole lot more class and style! Patterned or bright colored crop corsets look great with simple denim solid-colored shorts, while basic solid colors complete a look when paired with patterned shorts (they can also be paired with matching solid, bright colored tops). As for tank tops, I would choose bright colored, airy tops that I could tuck into my shorts and color block.
  3. Accessories: To complete your Ultra look, accessories are where it's at. Play around with funky colored studs and bracelets, such as the hot pink and purple ASOS watch pictured above and stacked neon beaded kandi bracelets (UMF staple). Also play around with interesting rings, such as the ASOS slinky rings seen above. Don't forget to pack a few hair ties, because it's bound to get hot out on the festival grounds!
  4. Hair: I think Ultra is the perfect opportunity to release your inner weirdo. Play with your hair color! If you're really daring, try dying your hair a funky color or use temporary hair dye to pull off this look à-la-Katy Perry or Riley Keough. You can also try dip-dyed (or ombré) ends in crazy colors like Peaches Geldof, dyed hair extensions like Mr. Kate, or even just a cool candy floss wig like Katy Perry or Scarlett Johansson.
  5. Bag: This is relatively simple. For any music festival, you don't want to be lugging around some huge purse - go simple. Find yourself a cute, cross-body bag or fashionable small, patterned book-bag that can carry your water bottle and other festival essentials and you're good to go!
  6. Nails: You can go all out with crazy, cool nail art for Ultra, but I would go with a simple metallic color. You don't want to overdo it with the neons or patterns after all. Personally, I would go with a gunmetal-colored polish, or simple black (matte is fun too). If you insist on nail art though, I would recommend what I did for Lollapalooza, which was marbeled nail art in dark metallic shades.
  7. Headgear: In a perfect world, it would be totally cool to walk around wearing quirky hair pieces all the time. So, if I were going to Ultra, I would totally DIY my own pair of lace mouse/rabbit ears. But, if you're not into being too showy, a simple statement headband will complete a look as well. If you're rocking bangs (like me =^.^=), I would recommend a cross-forehead "hippie" headband. It'll keep your bangs in check in case of any wind, and they're ultra chic. If you've got a center-part in your hair, I would definitely try wearing one of those chain hair-pieces (as pictured above; sorry I'm not sure exactly what they're called, but I know that they sell them at Urban Outfitters) to rock a Vanessa Hudgens-esque edgy look.
  8. Shoes: At any festival, you don't want to get too fancy with the footwear. If you're like me and would never even dream of wearing those signature furry rave boots, go with your basic sneaker or pair of TOMS. If you're traveling or staying away from home, you'll want to keep in mind that you want to pack light and should thus go with basic-colored shoes that can match with all of your weekend's outfits. You're also going to be standing for long periods of time so you'll want to pack comfortable shoes. Avoid sandals - festivals really aren't about looking super cute and girly and you really don't want to get your feet trampled by fellow festival-goers if you're going to be dancing in the crowds.
  9. Eyewear: Miami is extremely sunny and it can get pretty damn hot during the afternoon. Pack a pair of cute sunnies that will fit in your bag and you can put on whenever you need them. I would personally sport some heart-shaped Lolita sunnies, or Ray Ban Clubmasters.
  10. Makeup: If you're going to go all out with your outfit, keep the makeup simple. You want to fit in, but you don't want to look like a circus clown. If you're going with a bright outfit that's got lots of patterns, I would suggest more a more natural look, featuring a rosy cheek, some lip stain or subtle orange/peach/pink lipstick, winged eyeliner, and lash-thickening, waterproof mascara. If you've gone simple or darker with the outfit's tones, feel free to experiment with bright red lipsticks, such as MAC's Russian Red, or bright shades of orange and pink. You can also try  metallic eyeshadows, dramatic liner (such as glittery or different colored liquid liners), and - of course - bold lashes.
If you are going to Ultra, don't forget: 
  • It's a music festival, not a fashion show. Don't pack you're finest clothing or shoes, because they are bound to get ruined in the potential rain or amongst the crowds.
  • Pack light! There is nothing more unbearable than having to carry a heavy bag around the festival grounds and in the crowds - I am telling you this from personal experience. Your ticket, phone, water bottle, wallet, and perhaps some small touch-up items are enough.
  • WATER. It can get extremely warm in Miami even in Spring, so don't forget to pack water with you (also, you don't want to have to pay for overpriced water bottles on the festival grounds so best to take care of this beforehand). That aside, it's no secret that there's an abundance of drug use at Ultra. Not that I condone this, but if you're going to partake in that, please be responsible about it. Pack water.
  • Be safe! If you are going with friends, make sure to stay together or use - yes, I'm going to say it - the buddy system. I'm not sure about Ultra, but at Lollapalooza in Chicago, it was nearly impossible to get phone service in the city itself or on the festival grounds, and thus if someone got lost or separated, it was extremely difficult to find them again. I don't think Miami has that problem, but just in case, take precaution and stay together. This is also essential if you're going to be partaking in drug use. Keep each other safe and again, be responsible.
  • Have a blast. Don't let small drama get in the way of your happiness. Make it a weekend for the books!

Monday, March 12, 2012

Electric FM

Ass-Kickin' Playlist

PART 1

  1. R U Mine? - Arctic Monkeys
  2. Till I Get My Way - The Black Keys
  3. Mind Eraser, No Chaser - Them Crooked Vultures
  4. Bad Reputation - Joan Jett
  5. Do You Wanna Touch Me? - Joan Jett
  6. Call Me - Blondie
  7. Sappy - Nirvana
  8. London Dungeon - The Misfits
  9. She Is The New Thing - The Horrors
  10. Up The Bracket - The Libertines
  11. Androgynous Mind - Sonic Youth
  12. Last Day of Magic - The Kills
  13. Fuck The People - The Kills
  14. The Pretender - Foo Fighters
  15. All My Life - Foo Fighters

Monday, March 5, 2012

Electric FM

R U Mine? by Arctic Monkeys

One of my favorite bands in the world!
For when you're feeling like a badass. ;)

I'm a puppet on a string
Tracy Island, time-traveling diamond
Coulda shaped heartaches
Come to find ya fall in some velvet morning
Years too late
She’s a silver lining lone ranger riding
Through an open space
In my mind when she’s not right there beside me

I go crazy cause here isn’t where I wanna be
And satisfaction feels like a distant memory
And I can’t help myself,
All I wanna hear her say is “Are you mine?”

Are you mine?
Are you mine?
Are you mine?

I guess what I’m trying to say is I need the deep end
Keep imagining meeting, wished away entire lifetimes
Unfair we’re not somewhere misbehaving for days
Great escape lost track of time and space
She’s a silver lining climbing on my desire

And I go crazy cause here isn’t where I wanna be
And satisfaction feels like a distant memory
And I can’t help myself,
All I wanna hear her say is “Are you mine?”

Are you mine?
Are you mine?
Are you mine?

And the thrill of the chase moves in mysterious ways
So in case I’m mistaken,
I just wanna hear you say you got me baby
Are you mine?

She’s a silver lining lone ranger riding through an open space
In my mind when she’s not right there beside me
And I go crazy cause here isn’t where I wanna be

And satisfaction feels like a distant memory
And I can’t help myself,
All I wanna hear her say is “Are you mine?”

Well are you mine?
Are you mine?
Are you mine?

Sunday, March 4, 2012

A Chill in the Weather

It's been starting to get strangely chilly here in Miami (and in other states that my friends are off studying in) recently despite the fact that it's already March. So, listening to some mellow music and planning my wardrobe for the week ahead, I decided I would make a little feminine style inspiration Polyvore post for you guys! 

Feast your eyes:
1. An iPod chock-full of sunny or mood-fitting tunes is always a good idea - paired with a reliable pair of fashionable, quality headphones!

2. Delicate, feminine gold accessories such as these adorable gold bunny rabbit studs (gold diamond studs are a staple) and white-faced Marc Jacobs watch are always a good idea.

3. I'm all for a natural makeup look, but a clean face with a pair of bold eyes, rosy, blushing cheeks and light berry-stained lips is my absolute favorite. Don't be afraid to add some crisp winged eyeliner and fanned lashes to your look! (P.S. black eye makeup is classic and looks amazing no matter what hair color someone has) 

4. I can't get enough of colored pants this season! Pastels and corals are definitely in. I can't wait to get my hands on a pair of those mint skinnies!

5. Lace everything is in for this season. From mini dresses to blouses to fancy lace socks, lace is simply a staple this year.

6. Flirty bottoms are the best. Experiment with high waisted lace, denim, and knit shorts - as well as flowy and fitted skirts in bright colors, bold patterns, interesting fabrics, and varying lengths. For the chilly season, be sure to pair these with a pair of tights (and be playful with them - try different colored tights as well as different patterns).

7. Mini dresses are my life. For winter, I love wearing body conscious or flowy-skirted sweater dresses and pairing them with feminine accessories and ballerina flats (or, if I'm feeling a little edgy, I'll throw on a pair of combat boots).

8. It never really gets very cold in Miami, so throwing on an oversized cardigan or cozy sweater usually suffices during the chilly season. Try classic tones of navy, tan, and warm reds - and occasionally change it up with some playful pastels or neons. These also add a nice touch when paired with a flirty fitted top as pictured above and high waisted shorts or a flowy skirt and tights.

9. Feminine accessories like velvet hair-bows, simple jewelry, patterned scarves, funky footwear, and a statement bag add a delightful finishing touch on a great, girly outfit!

10. My mother always taught me that it was important to have a signature scent once you become a lady. Mine happens to be Daisy by Marc Jacobs (although it was previously Princess by Vera Wang, and occasionally I wear Love, Chloé by Chloé).

Sunday, February 19, 2012

Adventures in Nail Art


Recently while browsing through my favorite blog MollsSheWrote, I came across this Cheetah Print nail tutorial that she had posted a while back, and was instantly inspired to try out this new look since I had recently purchased by Milani Black Sketch Nail Art nail polish!

Anyway, I just wanted to share my results with you guys, and tell you how I did it.
(If you wish to see a video tutorial for Cheetah/Leopard Print nails, check out this link!)

Inspiration:

Products:
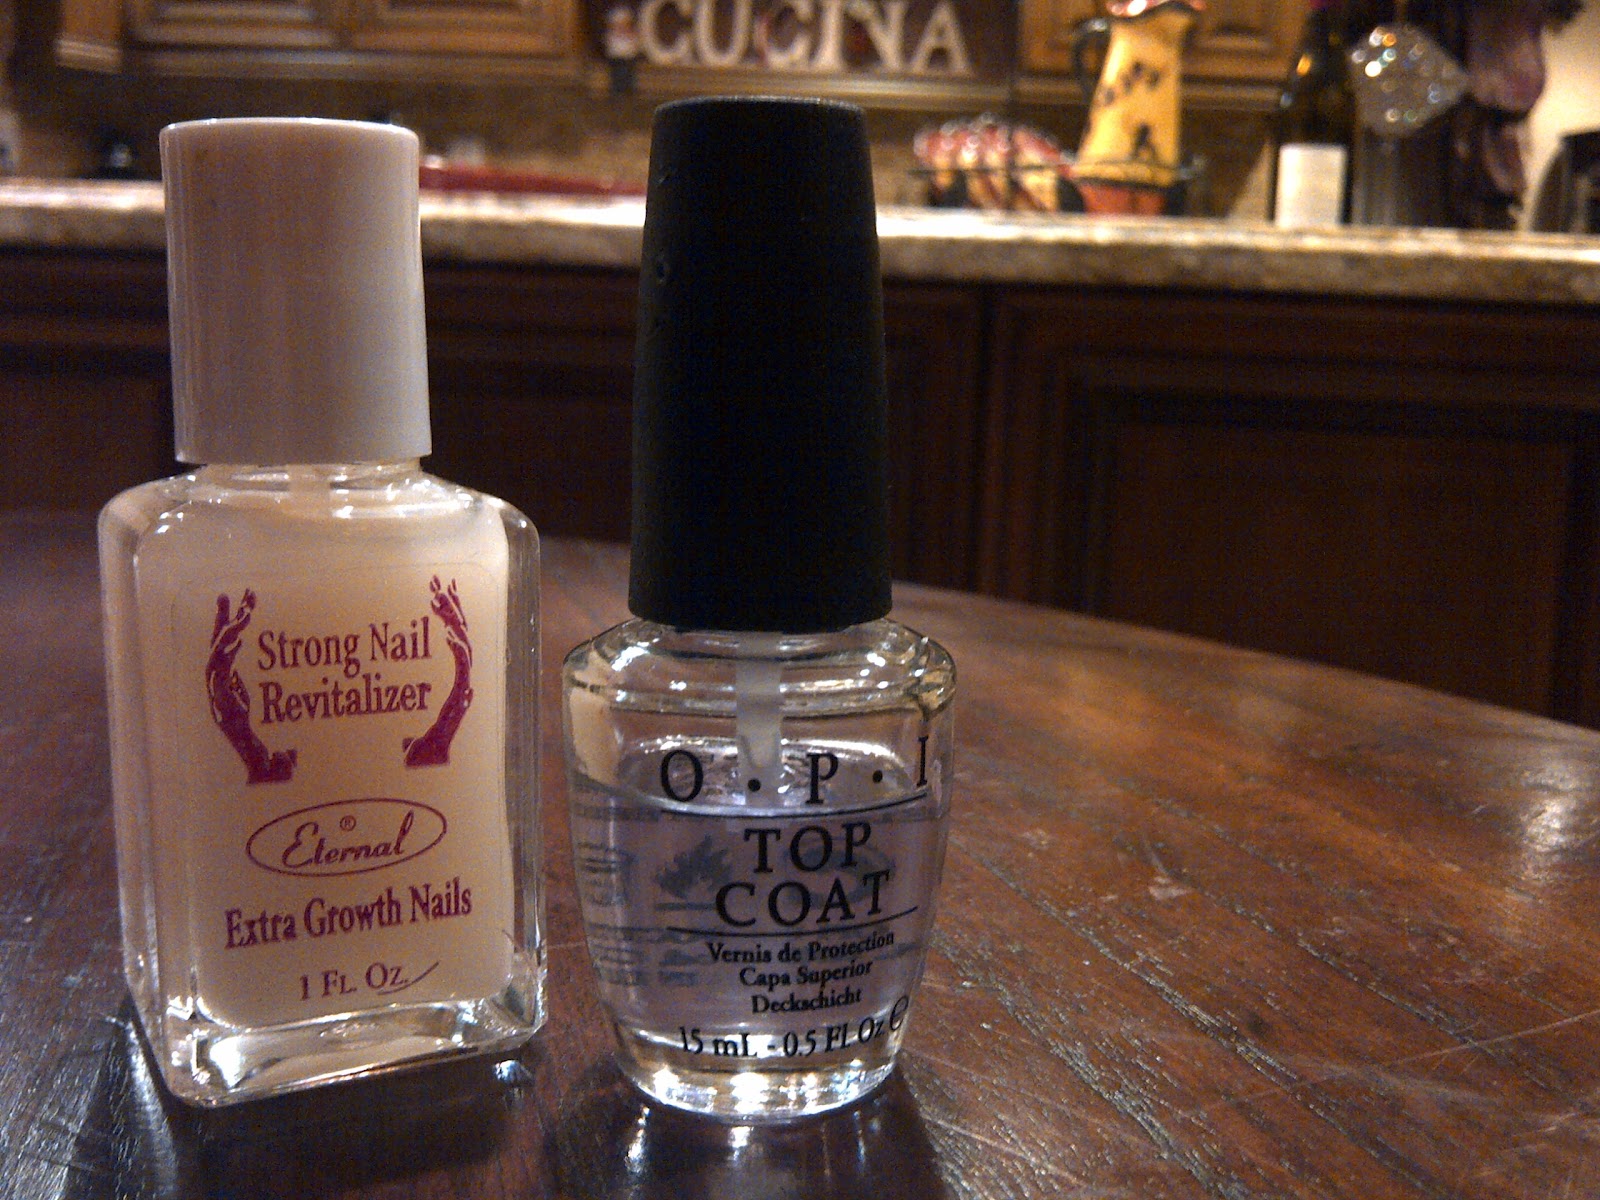
Eternal Strong Nail Revitalizer & OPI Top Coat

Essie French Affair, Katy Perry OPI The One That Got Away, Milani Nail Art in Black Sketch

How To:
  1. Gather your polishes! (Note: I used the Nail Revitalizer because I've noticed my nails have been a bit frail as of late, but you may use any basic Base Coat polish instead.)
  2. Apply the Base Coat and once dried, apply your base color - in this case French Affair by Essie.
  3. Once your base color has dried, take your second color (I recommend using a darker color polish for the spots) and apply different shaped splotches of paint onto the base color coat.
  4. After your spots have completely dried, take whichever polish you are using for your outline and paint small lines around the edges of your spots - make sure to leave small breaks in your lines in order to make your spots look leopard-like! You'll want to paint two to three outlines per spot.
  5. In order to add an even more leopard-esque effect, you may want to paint small dots or lines in either the spot color or outline color onto the base color coat surrounding the spots.
  6. Allow your outlines to dry completely in order to avoid running or smudging.
  7. Finally, apply your Top Coat, and voilà! Your look is complete!
Finished Product:

Note: If you don't have a nail art nail polish, you can use a normal nail polish brush, you just have to be careful to be precise and use the edge of your brush to paint to outlines. Here's an example of a time when I tried this:


And there you are! Yet another easy-to-execute and ultra-chic manicure for you guys to enjoy! 

Sunday, February 12, 2012

Fancy Footwork

Missoni-inspired look for less!

Madden Girl pumps - $30 at Marshall's

Too chic for words! I couldn't resist them. Although mine are powder blue, cream, pale pink, pastel green, and plum, they also sold the pumps in maroon, plum, cream, and tan - as well as both patterns on  adorable flats as pictured above!

Tuesday, February 7, 2012

Adventures in Nail Art


This past weekend I watched the film Submarine with my boyfriend after having gone to dinner at the posh French restaurant, George's, to celebrate our four year anniversary. Armed with full tummies and extremely satisfied appetites, we finally got around to watching this film on my laptop (we are huge Alex Turner/Arctic Monkeys fans, and we simply couldn't wait to hear the beautiful soundtrack our baby had composed for the film). Anyway, although this seems like an off course story, you'll soon see its relevance  - I promise!

So we watched it and I was (and still am) immediately inspired by the beautiful and unique cinematography and characters themselves. I absolutely adored the pale colors sharply contrasted with vibrant reds and deep shades of navy and black. Because of this, I wanted to create Submarine-inspired nails! At first I attempted to do so by choosing the most Submarine-esque colors from my nail polish collection and marble it, but I ended up just getting a look at was vibrant, but in all the wrong ways. And although this was a bummer, the jumble of bright colors did set me on the track to De Stijl nails! :)

Inspiration:
Products:
(Rimmel London Top Coat/Base Coat Pro, OPI Top Coat, Essie Marshmallow, Milani Nail Art Black Sketch, OPI Lucerne-tainly Look Marvelous, OPI Katy Perry The One That Got Away, Milani Reddest Red. The blue and yellow polishes were part of a 4 piece nail polish set I bought once at Urban Outfitters and don't have names, sorry!)

How To:
  1. Apply base coat (I used the Rimmel London Base Coat); let dry.
  2. Paint nail with two coats of any white nail polish to use as a base (I used Marshmallow by Essie)
  3. Using your Nail Art nail polish (after the white base has dried), carefully paint the basic line patterns you would like to use on your nails - remember to keep it very clean and give yourself adequate space to apply blocks of color! Note: I used a white base because my yellow & blue paints were relatively thin and thus required a base in order to have a bolder hue, but it if you do not have this same issue with your colored polishes, the white base coat is not necessary.
  4.  Once you've plotted out your lines and they have dried (make sure they dry so you can avoid the black (or whichever color you are using for your lines) mixing with the colors in the blocks, choose your first color.
  5. As carefully as possible, choose a block to fill in with the color you have chosen. Make sure there isn't a build up or little bubble of paint on your brush before you start applying any colors - you don't want the glob to fall on your nail and ruin all your work! Note: You may want to apply this same color to a certain block on each nail at this time to streamline the painting process.
  6. Repeat step 6 with the rest of the colors you've chosen. Go over each color with a second coat of polish.
  7. Go over the black lines you initially framed your blocks with in order to make your nails look cleaner and more precise.
  8. Allow nails to completely dry before applying your top coat! You don't want the lines or colors to run/smudge after all that hard work (trust me, it happened to me, and the repairing process took way longer than it would have if I just would have been patient). 
  9. Once you've applied your top coat, allow your nails to dry once more. 
  10. Take a few Q-Tips and Nail Polish Remover. Pull as much of the cotton off the end of the Q-Tip as possible so you are left with a thin layer of cotton. rub this stray cotton in a clockwise motion around the stick of the Q-Tip so that it all adheres to the stick. 
  11. Pour some nail polish remover into the cap of the bottle and dip your Q-Tip into the cap. 
  12. Use this damp Q-Tip to clean the edges around your nails and finally get that fresh, clean manicured look! :)
As you can see, this is a very time-consuming manicure that requires tons of patience, but it is well-wroth it! Not only will you yourself not be able to stop staring at your fabulous nails once they are completed, but your friends will be swooning over them as well!

Finished Product:


Voila! 

I hope you've enjoyed this nail tutorial & I apologize for the somewhat low quality photography, haha. I used solely my MacBook Pro and handy Blackberry's cameras to make this magic, so the photography is understandably a bit fuzzy and all that. Anyway, hope you all go out there and try this super fun look that even Mondrian himself would be proud of, and you definitely don't have to be some skilled nail artist to create. :) 

Thanks for reading!
Related Posts Plugin for WordPress, Blogger...